

HEAT EXCHANGER
Heat Exchanger Maintenance: The Complete Practical Guide for Engineers and Shutdown Professionals
If a heat exchanger fails, production stops. When production stops, losses multiply every minute, In refineries and petrochemical plants, heat exchangers are not just equipment . this is heart of refinery.
In this complete expert guide, I will walk you through real-world, field-tested knowledge — not textbook theory. This is written for engineers, supervisors, shutdown planners, QA/QC inspectors, and maintenance professionals who want practical clarity.
1. What is a Heat Exchanger?
A heat exchanger is a mechanical device designed to transfer heat between two fluids without mixing them. In refineries and petrochemical plants, heat exchangers are used to:
Preheat crude oil
Cool process fluids
Condense vapors
Recover waste heat
Improve energy efficiency
Basic Working Principle
Heat transfer happens through:
Conduction (through metal surface)
Convection (fluid movement)
Temperature difference (driving force)
The higher the temperature difference and surface area, the better the heat transfer.
2. Types of Heat Exchangers
Different industries use different types based on pressure, temperature, and fluid characteristics.
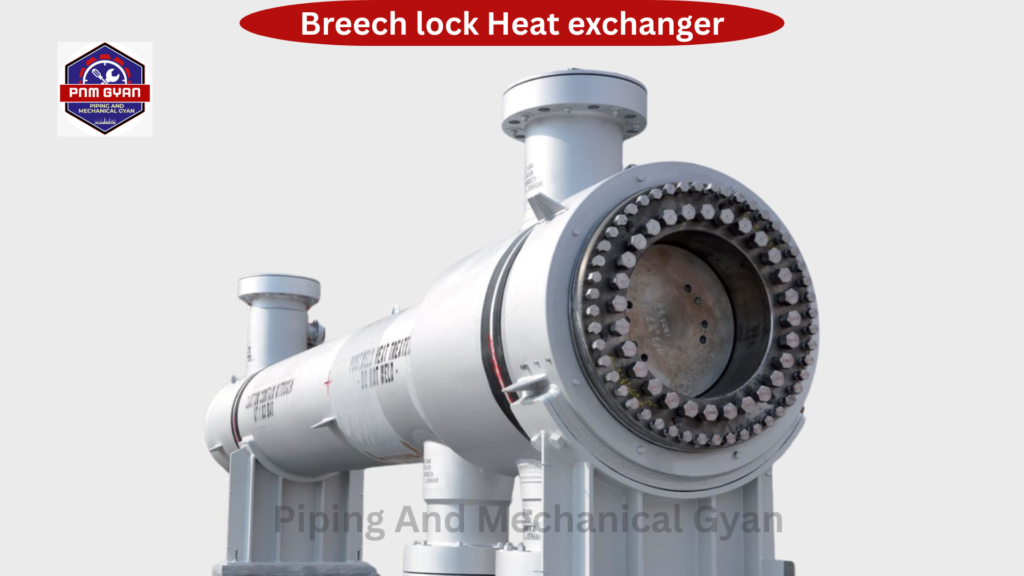
A. Shell and Tube Heat Exchanger
Most common in refineries. One fluid flows inside tubes, the other flows in the shell.
Best for:
High pressure
High temperature
Dirty fluids
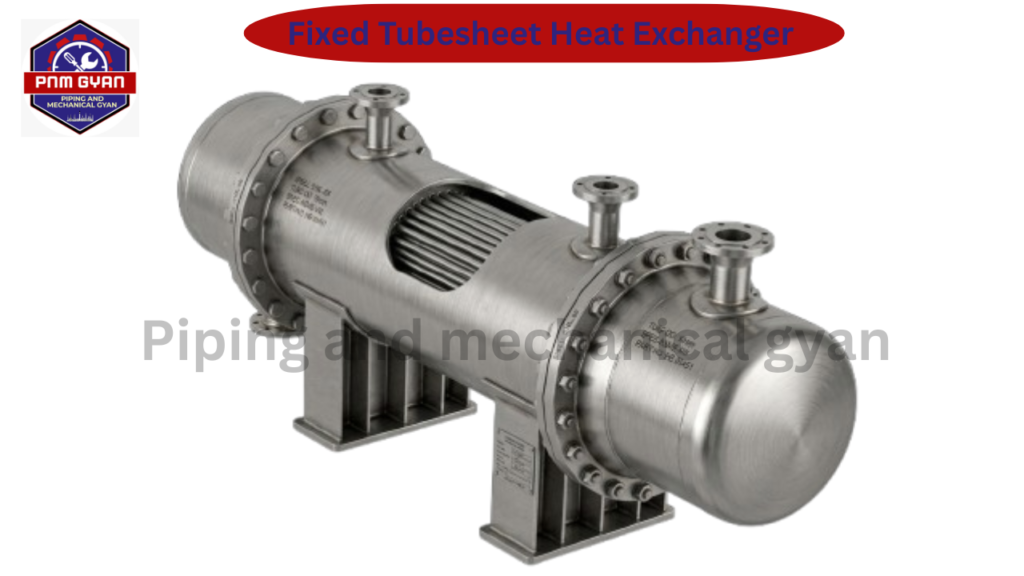
1.Fixed Tube sheet Heat Exchanger
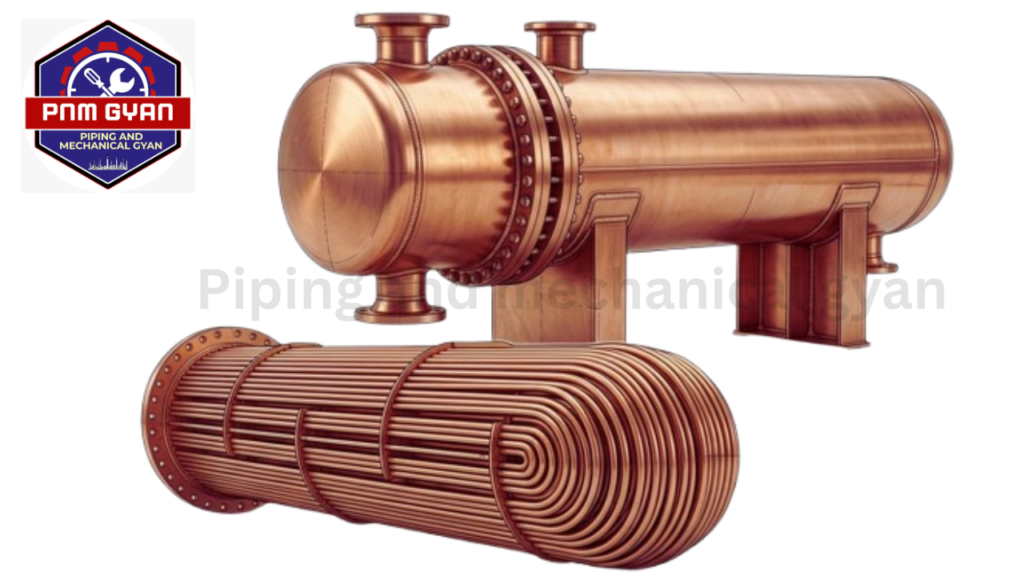
2.U Tube Heat Exchanger
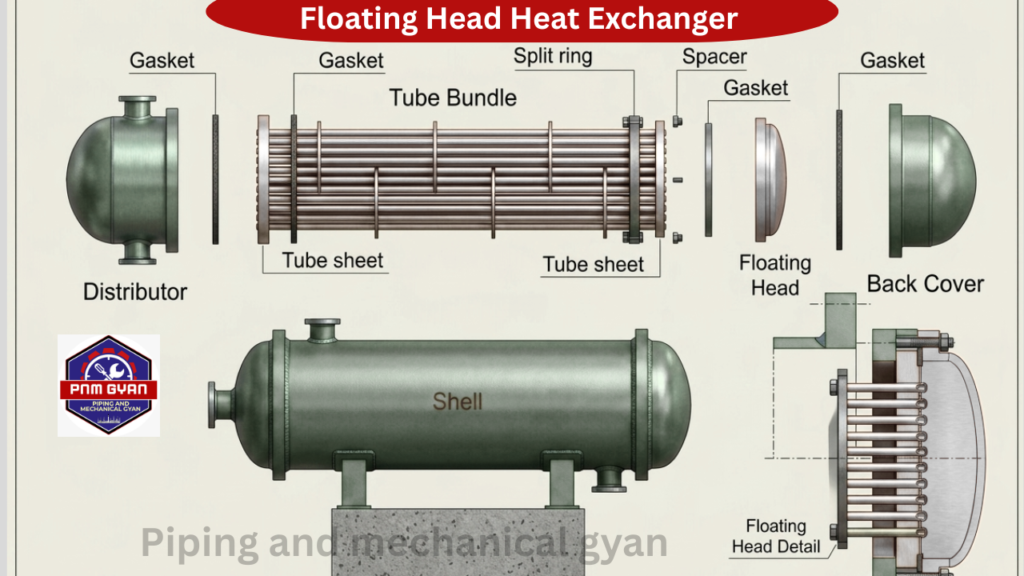
3.Floating Head Heat Exchanger
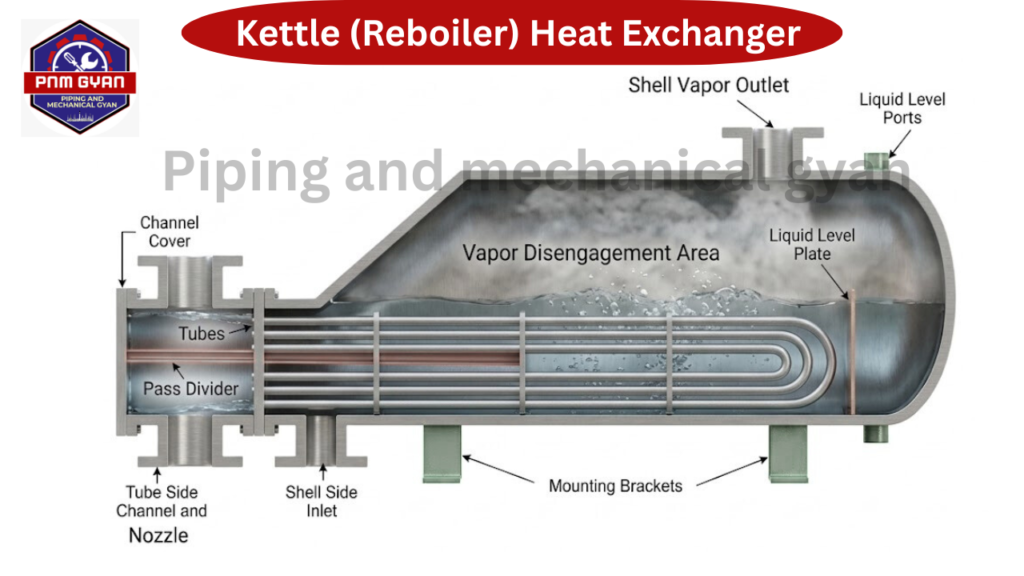
4.Reboiler /Kettle Type Heat Exchanger
5.Breech Lock Heat Exchanger
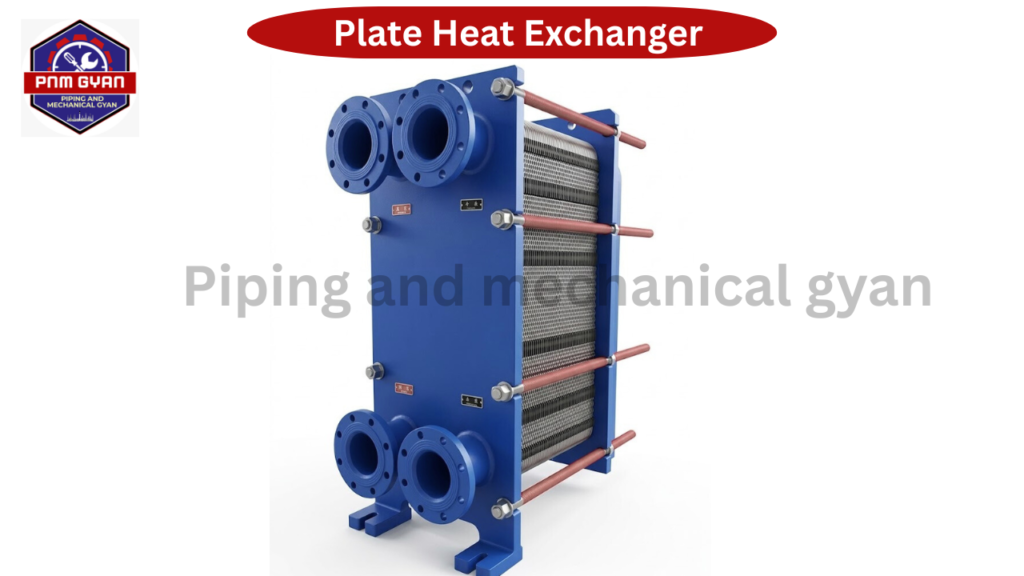
B. Plate Heat Exchanger
Thin plates stacked together.
Best for:
Low to medium pressure
Clean fluids
Compact installation
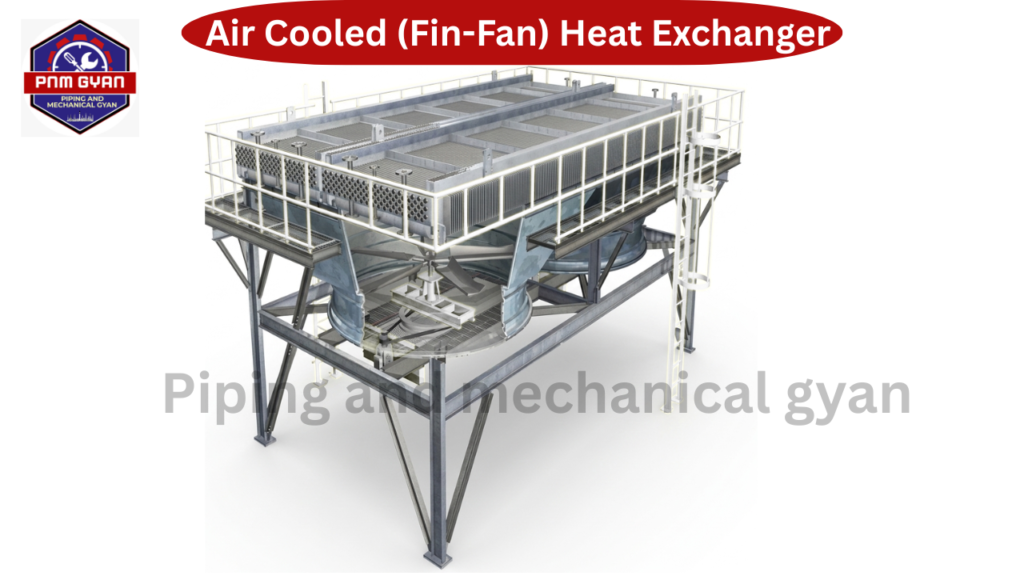
C. Air Cooled Heat Exchanger
Uses air instead of cooling water.
Best for:
Water-scarce areas
Outdoor installations
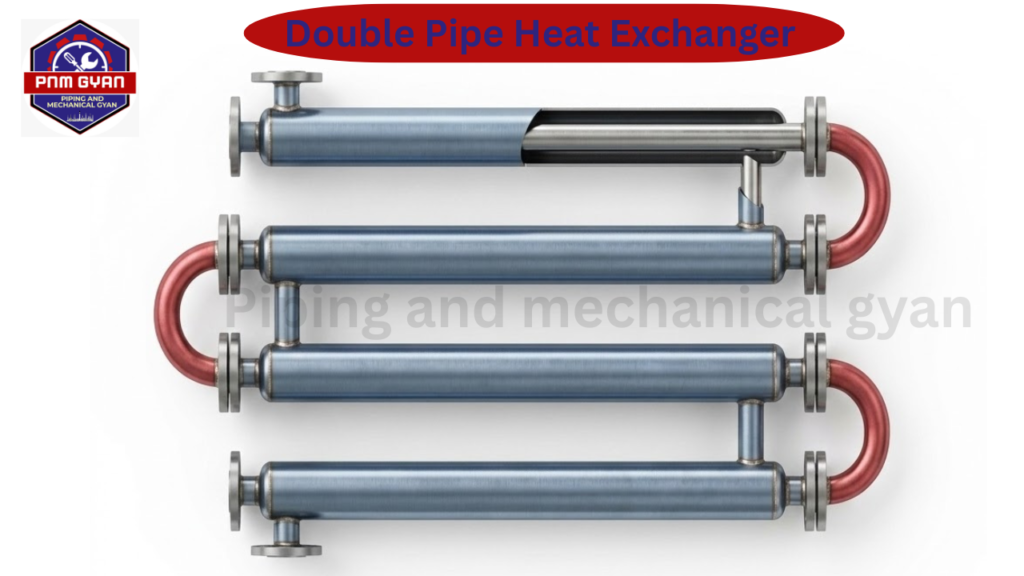
D. Double Pipe Heat Exchanger
Simple design, one pipe inside another.
Best for:
Small capacity systems
Each type has unique maintenance challenges — tube vibration, gasket failure, fouling, or corrosion.
3. Heat Exchanger Components and Their Functions
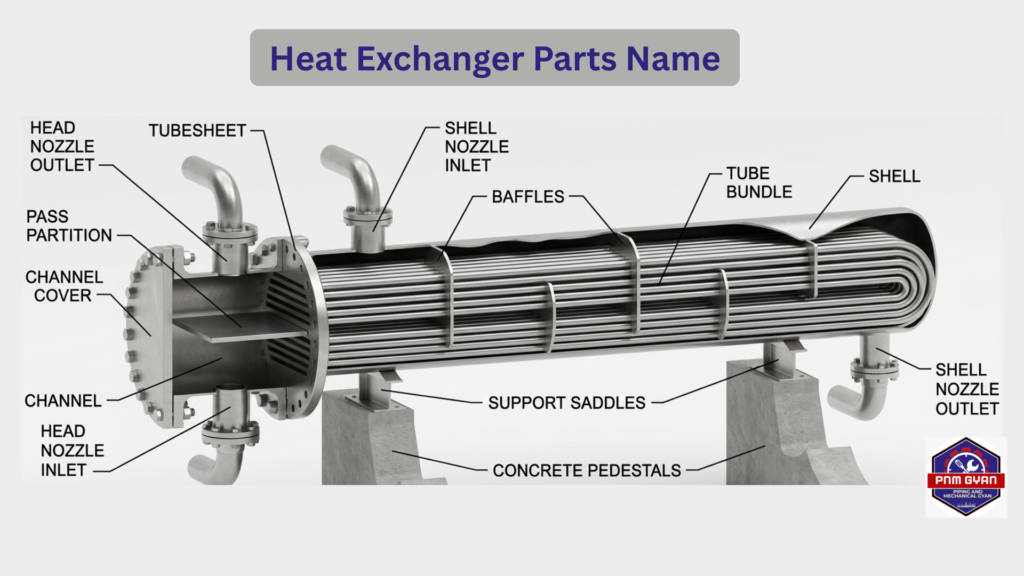
Shell – Outer body containing shell-side fluid
Tube Bundle – Core heat transfer element
Tubes – Carry tube-side fluid
Tube Sheet – Holds tubes in position
Baffles – Direct flow and increase turbulence
Channel Head, Channel Cover – Fluid distribution area
- Dome/Distributer – Distributes fluid evenly into tubes, ensuring balanced flow distribution.
- Partition plate – Separates passes, directing fluid flow through different tube sections.
- Impiggment plate – Protects tubes from high-velocity inlet fluid, reducing erosion damage.
- Shell Side Inlet, Outlet – Entry and exit points for shell-side fluid flow.
- Tube Side Inlet, Outlet – Entry and exit points for tube-side fluid flow.
- Gaskets – Prevent leakage
Flanges & Bolting – Provide sealing and dismantling access
Failure in any one of these can cause leakage
4. Construction Codes and Standards (ASME, TEMA, API)
Professional heat exchanger maintenance must comply with international standards.
ASME
The American Society of Mechanical Engineers (ASME) Section VIII governs pressure vessel design and fabrication.
TEMA
The Tubular Exchanger Manufacturers Association (TEMA) provides detailed mechanical standards for shell and tube exchangers.
API
The American Petroleum Institute (API) sets inspection and maintenance guidelines for refinery equipment.
Ignoring code compliance can lead to:
Legal penalties
Safety incidents
Equipment failure
5. Pre-Shutdown Activities: Planning and Safety Procedures
A successful shutdown begins weeks before opening bolts.
Key Activities:
Review drawings and datasheets
Prepare isolation plan
Risk assessment and JSA
Tool and manpower planning
Spare parts readiness
- Erect scaffolding if required
- Insulation and cladding remove
- Big blind and test- ring shift at location
Safety is not optional. It is mandatory.
6. Shutdown Activities: Isolation, Draining, and Blinding
Improper isolation causes accidents.
Step-by-Step:
Obtain work permit
Stop process flow
Depressurize system
Drain and vent both sides
Install blinds (positive isolation)
Gas test before opening
Always follow lock-out tag-out (LOTO).
7. Opening of Heat Exchanger: Step-by-Step Procedure
Opening must be systematic.
Mark flange and component orientation
Loosen bolts in cross pattern
Remove channel cover/ channel head/dome
Check for trapped pressure
Pull bundle using hydraulic bundle puller
Protect tubes from damage
Never use force blindly. Tube damage during opening is common.
8. Inspection Techniques
Inspection determines remaining life.
Visual Inspection (VI)
Check for corrosion, cracks, erosion.
Ultrasonic Testing (UT)
Measures thickness reduction.
Penetrant Testing (PT)
Detects surface cracks.
Eddy Current Testing (ECT)
Identifies internal tube defects without removal.
Proper inspection saves future shutdown costs.
9. Tube Inspection and Common Tube Failures
Tube failure is the most common issue.
Common Causes:
Pitting corrosion
Erosion at inlet
Vibration fatigue
Fouling
Tube-to-tube sheet leakage
Root cause analysis is critical. Replacing tubes without identifying cause leads to repeat failure.
10. Cleaning Methods
Heat transfer efficiency drops due to fouling.
Mechanical Cleaning
Hydro jetting
Rotary brush
Rod cleaning
Chemical Cleaning
Acid cleaning
Alkaline cleaning
Circulation cleaning
Always ensure compatibility with tube material.
11. Tube Repair, Plugging, and Replacement
Not every damaged tube needs replacement.
Tube Plugging
Used when limited tubes fail.
Tube Rolling
Re-expansion to seal leakage.
Tube Replacement
Required when damage is severe or repeated.
Excessive plugging reduces heat transfer capacity.
12. Gasket Selection, Flange Inspection, and Reassembly
Wrong gasket = future leakage.
Steps:
Inspect flange face
Check for warping
Select correct gasket type
Apply proper bolt torque
Tighten in star pattern
Never reuse compressed gaskets.
13. Hydrotesting and Leak Testing Procedures
Hydrotesting confirms mechanical integrity.
Process:
Fill with clean water
Remove air pockets
Raise pressure gradually
Hold as per design code
Inspect for leakage
Never stand in front of flanges during pressurization.
14. Commissioning and Post-Maintenance Monitoring
Startup should be gradual.
Remove blinds
Reconnect lines
Increase temperature slowly
Monitor vibration
Check for leaks
First 24 hours are critical.
15. Preventive Maintenance Strategy and Troubleshooting Guide
Reactive maintenance is expensive. Preventive maintenance is profitable.
Monitor:
Pressure drop
Temperature difference
Flow rate
Vibration
Troubleshooting Examples:
High pressure drop → Fouling
Temperature drop low → Scaling
Sudden leakage → Tube failure
Final Words
A heat exchanger is not just equipment. It is a system that demands planning, inspection, precision, and discipline.
If you work in refinery shutdowns, petrochemical maintenance, or piping projects, mastering heat exchanger maintenance will make you more valuable than 80% of technicians in the field.At Piping and Mechanical Gyan, our goal is simple:
Practical knowledge. Real industry clarity. Zero or efficiency loss.